


Shipping!
Limited Time Only
Automatically Applied
Mainland UK delivery only

decking & cladding delivered to your door
shop by colour
SHOP BY SIZE
Installing composite decking is a job experienced DIYers can take on, provided the sub-frame is properly prepared and the boards are fitted according to the correct spacing and fixing requirements.
Our composite decking uses starter/end clips and T-Clips to secure the boards in position. This guide takes you through the Modern Garden installation process, from measuring your decking area through to fitting the end caps.
Before starting, plan the complete deck and make sure you have enough composite decking, fixings and other materials for the area you intend to cover.
A little planning before you start cutting or fixing boards can save problems later in the installation.
Begin by measuring the length and width of the proposed decking area so you can calculate the square metres you need to cover. You can use the decking calculator available on our decking products to help work out how much decking you require.
You should also decide which direction you want the boards to run. This matters because the joists forming your sub-frame need to run perpendicular to the decking boards.
The exact tools required will depend on the sub-frame you are building and any cutting required for your particular layout. For the decking itself, make sure you have suitable equipment for measuring, marking, cutting and fixing the boards.
Your installation will also require:
Once you have measured the area and planned the direction of the boards, you can begin preparing the deck.
The 5 steps at a glance:
Plan & Measure Your Decking Area
Start by marking out the area you want to deck and taking accurate measurements.
Calculate the total area in square metres before ordering your boards. The decking calculator available on our decking products can help you estimate how much material your project requires.
At this stage, decide how you want the finished boards to run across the area. Think about the dimensions of the deck and where board ends will fall before building the frame underneath.
Planning the layout first also gives you an opportunity to check how your chosen board lengths will work across the space and identify where cuts may be required.

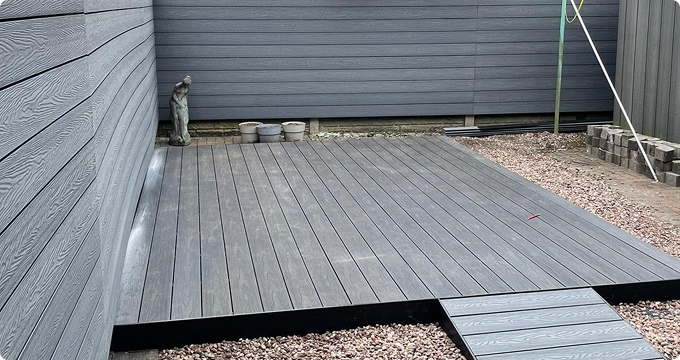
Build & Position The Sub-Frame
The sub-frame provides the support beneath your composite decking, so its layout needs to be established before any boards are fitted.
Choose a suitable material for the sub-frame and build it to fit the decking area you planned in Step 1.
We recommend 40cm centre spacing for the joists.
The direction of the joists is also important. Each joist should run perpendicular to the direction in which you intend to lay the decking boards. If your decking boards will run away from the property, for example, the supporting joists need to cross underneath them rather than follow the same direction.
Check the frame as you work to make sure it provides consistent support across the decking area. Complete the sub-frame before moving on to the board fixings.
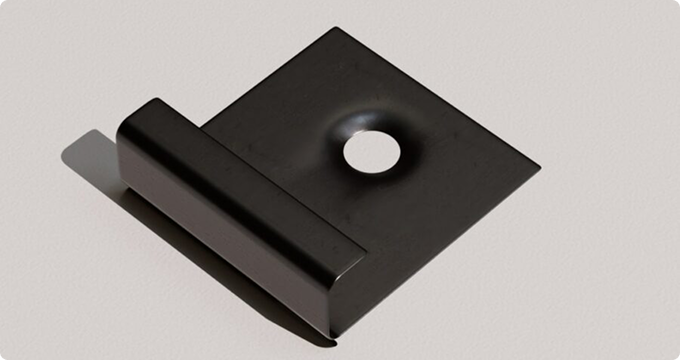
Install Starter/End Clips
Once the decking frame is complete, you can fit the starter/end clips for the first board.
Starter/end clips hold the edge of the first decking board in position. Install one on every joist row where the first board will begin.
Allow a 10mm gap behind the starter clips for expansion when fixing them.
Keeping this gap consistent along the starting edge is important. Work across the frame carefully rather than positioning the clips by eye.
Once every starter/end clip is secured, check their position before introducing the first decking board. Correct positioning here helps establish the line followed by the rest of the deck.
Lay Boards & Secure With T-Clips
Position your first composite decking board against the starter/end clips. The clips fit into the groove running along the side of the decking board.
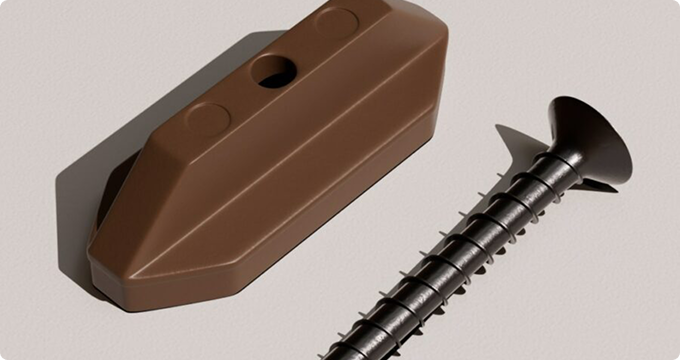
Once the first edge is sitting correctly within the starter clips, secure the opposite side using our T-Clip and Screw fixings.
Fit a Plastic T-Clip and screw at every joist beneath the board.
The T-Clips secure the board while preparing the fixing point for the next one. Slide your next decking board towards the fitted T-Clips, making sure it sits correctly in position. You can then install the next set of T-Clips and screws along the opposite side.
Continue this process across the deck:
Keep checking the deck as you work rather than waiting until every board has been installed. This makes it easier to spot an issue with alignment or positioning before you have continued across the entire area.
Add Finishing Touches With End Caps
Once all the composite decking boards have been fitted, check the completed surface and deal with any exposed board ends that require finishing.
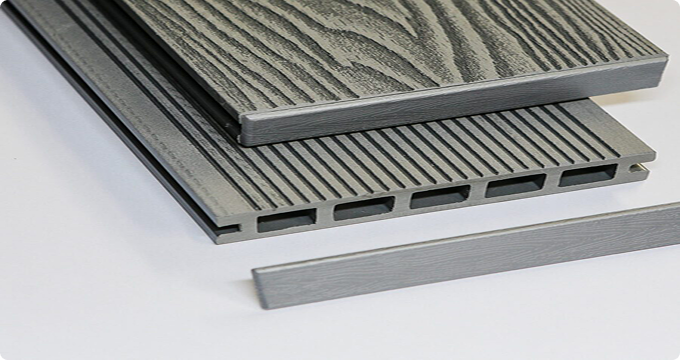
Modern Garden’s Plastic Push-In End Caps fit into the open ends of compatible decking boards to provide a neater finished appearance.
Fit the required end caps once you are satisfied that the decking boards have been installed correctly.
✓ Your composite decking installation is then complete.
Composite decking requires relatively little ongoing maintenance once installed.
You do not need to routinely paint, stain or seal the boards in the way you would with traditional timber decking.
Leaves, soil and other garden debris should still be removed when they collect on the surface. Cleaning the deck when required will also help prevent dirt from building up over time.
Pay attention to the deck during normal use as well. If a board or fixing appears to have moved or become damaged, investigate the cause rather than leaving the problem to develop.
Composite decking can be installed as a DIY project if you are comfortable measuring, cutting materials and constructing the supporting frame.
The quality of the sub-frame and accuracy of the installation matter, so consider professional help if you are unsure about building a suitable supporting structure or completing any part of the project safely.
Composite decking boards need a suitable supporting sub-frame rather than being laid directly onto the ground.
The frame provides the joists onto which the decking boards and fixing clips are secured. The appropriate construction of the base will depend on the site and the sub-frame material being used.
Modern Garden recommends 40cm centre spacing for the joists when installing our composite decking.
Joists should run perpendicular to the direction of the decking boards so that each board receives the required support and fixing points.
Start at the planned edge of the deck by fitting a starter/end clip to every joist row.
Allow a 10mm expansion gap behind the starter clips before fixing them. The groove in the first decking board then slides into these clips before the opposite edge is secured using T-Clips and screws.
For the Modern Garden installation method covered in this guide, allow a 10mm gap behind the starter clips for expansion.
Follow the requirements for the specific decking system you are installing rather than applying measurements from an unrelated product.
The joists should run perpendicular to your composite decking boards. Decide which direction you want the finished boards to run while planning the deck, then position the joists across that direction.
Modern Garden composite decking uses starter/end clips at the first board, followed by Plastic T-Clips and screws.
Fit a T-Clip and screw at every joist after positioning the first board. The next decking board slides against those clips before another set is fitted. Continue the same process across the deck.
The Modern Garden fixing system uses T-Clips between the decking boards as you work across the deck. You should follow the spacing created by the specified fixing system and any requirements supplied with your particular decking product rather than manually choosing an arbitrary gap.
A successful composite decking installation starts with careful measurements and a properly prepared sub-frame. Following the correct joist spacing, expansion allowance and fixing process will help you install the boards as intended.
Browse our composite decking to choose the boards for your project, then make sure you have the appropriate starter/end clips and T-Clips and screws before beginning your installation.
If you are unsure which products or decking accessories you need, contact the Modern Garden team before starting your deck.
